This chapter briefly discusses the boot sequence of an (Intel 32-bit or 64-bit) Linux computer.
Systems booting with lilo are rare nowadays, so this section is brief.
The most common bootloader on Linux systems today is grub, yet this is not a Linux project. Distributions like FreeBSD and Solaris also use grub.
Likewise, grub is not limited to Intel architecture. It can also load kernels on PowerPC.
Note that grub, while still the default in Debian, is slowly being replaced in most distributions with grub2.
The exact order of things that happen when starting a computer system, depends on the hardware architecture (Intel x86 is different from Sun Sparc etc), on the boot loader (grub is different from lilo) and on the operating system (Linux, Solaris, BSD etc). Most of this chapter is focused on booting Linux on Intel x86 with grub.
A computer starts booting the moment you turn on the power (no kidding). This first process is called post or power on self test. If all goes well then this leads to the bios. If all goes not so well, then you might hear nothing, or hear beeping, or see an error message on the screen, or maybe see smoke coming out of the computer (burning hardware smells bad!).
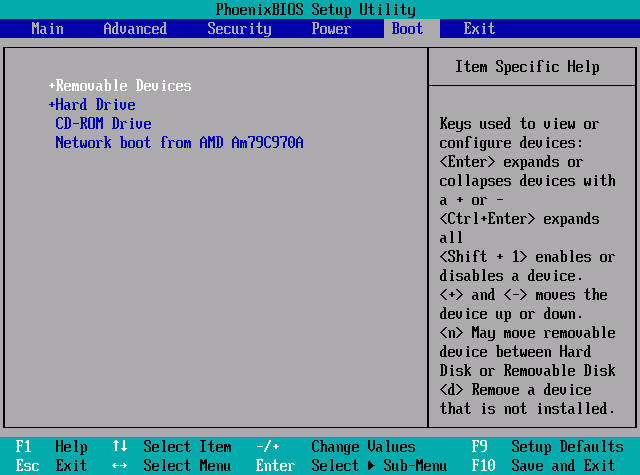
All Intel x86 computers will have a basic input/output system or bios to detect, identify and initialize hardware. The bios then goes looking for a boot device. This can be a floppy, hard disk, cdrom, network card or usb drive.
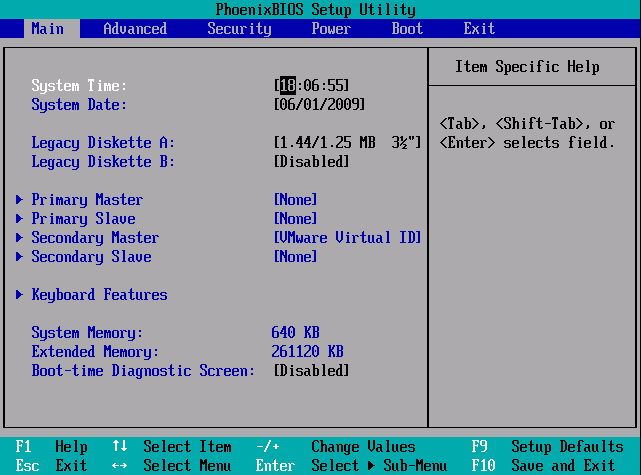
During the bios you can see a message on the screen telling you which key (often Del or F2) to press to enter the bios setup.
Sun sparc systems start with openboot to test the hardware and to boot the operating system. Bill Callkins explains openboot in his Solaris System Administration books. The details of openboot are not the focus of this course.
The bios allows you to set a password. Do not forget this password, or you will have to open up the hardware to reset it. You can sometimes set a password to boot the system, and another password to protect the bios from being modified.
The bios will look for a boot device in the order configured in the bios setup. Usually an operating system on a production server boots of a hard disk.
The master boot record or mbr is the first sector of a hard disk. The partitioning of a disk in primary partitions, and the active partition are defined in the mbr.
The mbr is 512 bytes long and can be copied with dd.
dd if=/dev/sda of=bootsect.mbr count=1 bs=512
The mbr is executed by the bios and contains either (a small) bootloader or code to load a bootloader.
Looking at the mbr with od can reveal information about the bootloader.
paul@laika:~$ sudo dd if=/dev/sda count=1 bs=16 skip=24 2>/dev/null|od -c
0000000 376   G   R   U   B      \0   G   e   o   m  \0   H   a   r   d
0000020
There are a variety of bootloaders available, most common on Intel architecture is grub, which is replacing lilo in many places. When installing Linux on sparc architecture, you can choose silo, Itanium systems can use elilo, IBM S/390 and zSeries use z/IPL, Alpha uses milo and PowerPC architectures use yaboot (yet another boot loader).
Bootable cd's and dvd's often use syslinux.
The goal of all this is to load an operating system, or rather the kernel of an operating system. A typical bootloader like grub will copy a kernel from hard disk to memory, and will then hand control of the computer to the kernel (execute the kernel).
Once the Linux kernel is loaded, the bootloader turns control over to it. From that moment on, the kernel is in control of the system. After discussing bootloaders, we continue with the init system that starts all the daemons.
Debian switched to grub2, which will be discussed in the next section. The main boot menu configuration file for grub2 is grub.cfg.
root@debian7:~# ls -l /boot/grub/grub.cfg
-r--r--r-- 1 root root 2453 May 13 17:22 /boot/grub/grub.cfg
root@debian7:~#
Distributions like Red Hat Enterprise Linux 6 use grub.conf and provide a symbolic link from /boot/grub/menu.lst and from /etc/grub.conf to this file.
[root@centos65 ~]# ls -l /boot/grub/menu.lst
lrwxrwxrwx. 1 root root 11 Mar  7 11:53 /boot/grub/menu.lst -> ./grub.conf
[root@centos65 ~]# ls -l /boot/grub/grub.conf
-rw-------. 1 root root 1189 May  5 11:47 /boot/grub/grub.conf
[root@centos65 ~]#
The file currently (RHEL 6.5) looks like this:
[root@centos65 ~]# more /boot/grub/grub.conf
# grub.conf generated by anaconda
#
# Note that you do not have to rerun grub after making changes to this file
# NOTICE:  You have a /boot partition.  This means that
#          all kernel and initrd paths are relative to /boot/, eg.
#          root (hd0,0)
#          kernel /vmlinuz-version ro root=/dev/mapper/VolGroup-lv_root
#          initrd /initrd-[generic-]version.img
#boot=/dev/sda
default=0
timeout=5
splashimage=(hd0,0)/grub/splash.xpm.gz
hiddenmenu
title CentOS (2.6.32-431.11.2.el6.x86_64)
        root (hd0,0)
        kernel /vmlinuz-2.6.32-431.11.2.el6.x86_64 ro root=/dev/mapper/VolGr\
oup-lv_root rd_NO_LUKS LANG=en_US.UTF-8 rd_NO_MD rd_LVM_LV=VolGroup/lv_swap \
SYSFONT=latarcyrheb-sun16 crashkernel=auto rd_LVM_LV=VolGroup/lv_root  KEYBO\
ARDTYPE=pc KEYTABLE=us rd_NO_DM rhgb quiet
        initrd /initramfs-2.6.32-431.11.2.el6.x86_64.img
title CentOS (2.6.32-431.el6.x86_64)
        root (hd0,0)
        kernel /vmlinuz-2.6.32-431.el6.x86_64 ro root=/dev/mapper/VolGroup-l\
v_root rd_NO_LUKS LANG=en_US.UTF-8 rd_NO_MD rd_LVM_LV=VolGroup/lv_swap SYSFO\
NT=latarcyrheb-sun16 crashkernel=auto rd_LVM_LV=VolGroup/lv_root  KEYBOARDTY\
PE=pc KEYTABLE=us rd_NO_DM rhgb quiet
        initrd /initramfs-2.6.32-431.el6.x86_64.img
[root@centos65 ~]#The menu commands must be at the top of grub's configuration file.
The default command sets a default entry to start. The first entry has number 0.
default=0
Each entry or stanza starts with a title directive.
Every operating system or kernel that you want to boot with grub will have a stanza aka an entry of a couple of lines. Listed here are some of the common stanza commands.
Technically the boot command is only mandatory when running the grub command line. This command does not have any parameters and can only be set as the last command of a stanza.
boot
The kernel command points to the location of the kernel. To boot Linux this means booting a gzip compressed zImage or bzip2 compressed bzImage.
This screenshot shows a kernel command used to load a Debian kernel.
kernel /boot/vmlinuz-2.6.17-2-686 root=/dev/hda1 ro
And this is how RHEL 5 uses the kernel command.
kernel /vmlinuz-2.6.18-128.el5 ro root=/dev/VolGroup00/LogVol00 rhgb quiet
All parameters in the kernel line can be read by the kernel itself or by any other program (which are started later) by reading /proc/cmdline
Many Linux installations will need an initial ramdisk at boot time. This can be set in grub with the initrd command.
Here a screenshot of Debian 4.0
initrd /boot/initrd.img-2.6.17-2-686
And the same for Red Hat Enterprise Linux 5
initrd /initrd-2.6.18-128.el5.img
The root command accepts the root device as a parameter.
The root command will point to the hard disk and partition to use, with hd0 as the first hard disk device and hd1 as the second hard disk device. The same numbering is used for partitions, so hd0,0 is the first partition on the first disk and hd0,1 is the second partition on that disk.
root (hd0,0)
The savedefault command can be used together with default saved as a menu command. This combination will set the currently booted stanza as the next default stanza to boot.
default saved
timeout 10

title Linux
root (hd0,0)
kernel /boot/vmlinuz
savedefault

title DOS
root (hd0,1)
makeactive
chainloader +1
savedefault
With grub booting, there are two choices: loading an operating system or chainloading another bootloader. The chainloading feature of grub loads the bootsector of a partition (that contains an operating system).
Some older operating systems require a primary partition that is set as active. Only one partition can be set active so grub can do this on the fly just before chainloading.
This screenshot shows how to set the first primary partition active with grub.
root  (hd0,0)
makeactive
Chainloading refers to grub loading another operating system's bootloader. The chainloader switch receives one option: the number of sectors to read and boot. For DOS and OS/2 one sector is enough. Note that DOS requires the boot/root partition to be active!
Here is a complete example to chainload an old operating system.
title MS-DOS 6.22
root  (hd0,1)
makeactive
chainloader +1
This is a screenshot of a Debian 4 stanza.
title   Debian GNU/Linux, kernel 2.6.17-2-686
root    (hd0,0)
kernel  /boot/vmlinuz-2.6.17-2-686 root=/dev/hda1 ro
initrd  /boot/initrd.img-2.6.17-2-686
Here a screenshot of a Red Hat Enterprise Linux 5 stanza.
title Red Hat Enterprise Linux Server (2.6.18-128.el5)
 root (hd0,0)
 kernel /vmlinuz-2.6.18-98.el5 ro root=/dev/VolGroup00/LogVol00 rhgb quiet
 initrd /initrd-2.6.18-98.el5.img
At boot time, when the grub menu is displayed, you can type e to edit the current stanza. This enables you to add parameters to the kernel.
One such parameter, useful when you lost the root password, is single. This will boot the kernel in single user mode (although some distributions will still require you to type the root password.
kernel /boot/vmlinuz-2.6.17-2-686 root=/dev/hda1 ro single
Another option to reset a root password is to use an init=/bin/bash parameter.
kernel /boot/vmlinuz-2.6.17-2-686 root=/dev/hda1 ro init=/bin/bash
Note that some distributions will disable this option at kernel compile time.
Run the grub-install command to install grub. The command requires a destination for overwriting the boot sector or mbr.
# grub-install /dev/hda
You will rarely have to do this manually, since grub is installed when installing the operating system and does not need any re-install when changing configuration (as is the case for lilo).
The main configuration file is now /boot/grub/grub.cfg. And while this file may look familiar, one should never edit this file directly (because it is generated!).
root@debian7:~# ls -l /boot/grub/grub.cfg
-r--r--r-- 1 root root 2453 May 13 17:22 /boot/grub/grub.cfg
root@debian7:~# head -3 /boot/grub/grub.cfg
#
# DO NOT EDIT THIS FILE
#
The /etc/grub.d/40_custom file can be changed to include custom entries. These entries are automatically added to grub.
root@debian7:~# ls -l /etc/grub.d/40_custom
-rwxr-xr-x 1 root root 214 Jul  3  2013 /etc/grub.d/40_custom
root@debian7:~# cat /etc/grub.d/40_custom
#!/bin/sh
exec tail -n +3 $0
# This file provides an easy way to add custom menu entries.  Simply type the
# menu entries you want to add after this comment.  Be careful not to change
# the 'exec tail' line above.
The new configuration file for changing grub is now /etc/default/grub.
root@debian7:~# head /etc/default/grub
# If you change this file, run 'update-grub' afterwards to update
# /boot/grub/grub.cfg.
# For full documentation of the options in this file, see:
#   info -f grub -n 'Simple configuration'

GRUB_DEFAULT=0
GRUB_TIMEOUT=5
GRUB_DISTRIBUTOR=`lsb_release -i -s 2> /dev/null || echo Debian`
GRUB_CMDLINE_LINUX_DEFAULT="quiet"
GRUB_CMDLINE_LINUX="debian-installer=en_US"
lilo used to be the most used Linux bootloader, but is steadily being replaced with grub and recently grub2.
Here is an example of a lilo.conf file. The delay switch receives a number in tenths of a second. So the delay below is three seconds, not thirty!
boot = /dev/hda
delay = 30

image = /boot/vmlinuz
  root = /dev/hda1
  label = Red Hat 5.2

image = /boot/vmlinuz
  root = /dev/hda2
  label = S.U.S.E. 8.0

other = /dev/hda4
  table = /dev/hda
  label = MS-DOS 6.22
The configration file shows three example stanzas. The first one boots Red Hat from the first partition on the first disk (hda1). The second stanza boots Suse 8.0 from the next partition. The last one loads MS-DOS.
0. Find out whether your system is using lilo, grub or grub2. Only do the practices that are appropriate for your system.
1. Make a copy of the kernel, initrd and System.map files in /boot. Put the copies also in /boot but replace 2.x or 3.x with 4.0 (just imagine that Linux 4.0 is out.).
2. Add a stanza in grub for the 4.0 files. Make sure the title is different.
3. Set the boot menu timeout to 30 seconds.
4. Reboot and test the new stanza.
0. Find out whether your system is using lilo, grub or grub2. Only do the practices that are appropriate for your system.
1. Make a copy of the kernel, initrd and System.map files in /boot. Put the copies also in /boot but replace 2.x or 3.x with 4.0 (just imagine that Linux 4.0 is out.).
[root@centos65 boot]# uname -r
2.6.32-431.11.2.el6.x86_64
[root@centos65 boot]# cp System.map-2.6.32-431.11.2.el6.x86_64 System.map-4.0
[root@centos65 boot]# cp vmlinuz-2.6.32-431.11.2.el6.x86_64 vmlinuz-4.0
[root@centos65 boot]# cp initramfs-2.6.32-431.11.2.el6.x86_64.img initramfs-4.0\
.img
Do not forget that the initrd (or initramfs) file ends in .img .
2. Add a stanza in grub for the 4.0 files. Make sure the title is different.
[root@centos65 grub]# cut -c1-70 menu.lst | tail -12
title CentOS (4.0)
        root (hd0,0)
        kernel /vmlinuz-4.0 ro root=/dev/mapper/VolGroup-lv_root rd_NO_LUKS L
        initrd /initramfs-4.0.img
title CentOS (2.6.32-431.11.2.el6.x86_64)
        root (hd0,0)
        kernel /vmlinuz-2.6.32-431.11.2.el6.x86_64 ro root=/dev/mapper/VolGro
        initrd /initramfs-2.6.32-431.11.2.el6.x86_64.img
title CentOS (2.6.32-431.el6.x86_64)
        root (hd0,0)
        kernel /vmlinuz-2.6.32-431.el6.x86_64 ro root=/dev/mapper/VolGroup-lv
        initrd /initramfs-2.6.32-431.el6.x86_64.img
[root@centos65 grub]#
3. Set the boot menu timeout to 30 seconds.
[root@centos65 grub]# vi menu.lst
[root@centos65 grub]# grep timeout /boot/grub/grub.conf
timeout=30
4. Reboot and test the new stanza.
[root@centos65 grub]# reboot

Select your stanza and if it boots then you did it correct.